Astro van with no bumper!
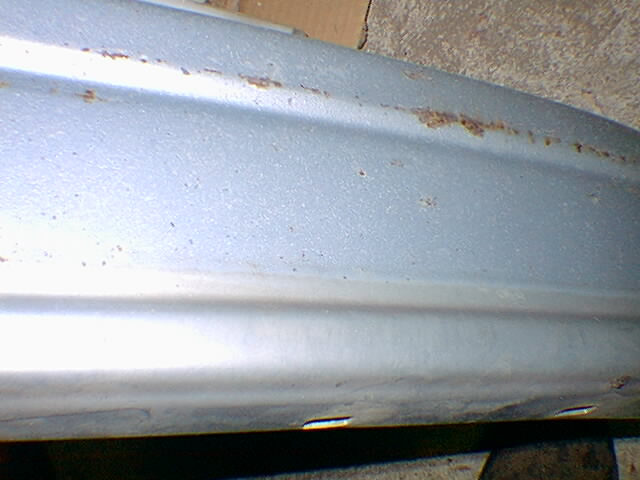
Over this past winter's
ice storm while parallel parked on a hill downtown, somebody backed into
my machine, and twisted the driver's side end of the bumper, and scratched
it up, starting rust, and making my ride look like I don't know hot to
drive. So I got sick of looking at it this past Saturday, and here's
what happened!
April 8, 2000. I pulled the bumper off the van. It is held on with 10 bolts, 15 millimeter in size. It is bolted right onto the end of the frame rails, and the bolts are easily accessed from underneath. There are also braces that extend from the end, back to the frame rail. These are also held in by 15mm bolts, and are easy to get to. An impact wrench is the best thing to get these off, since they can be on there pretty tough. You will also need to remove 2 10 millimeter bolts at either ends of the plastic air dam. These hold the air dam to the fenders, but the rest of the air dam is bolted to the bumper.
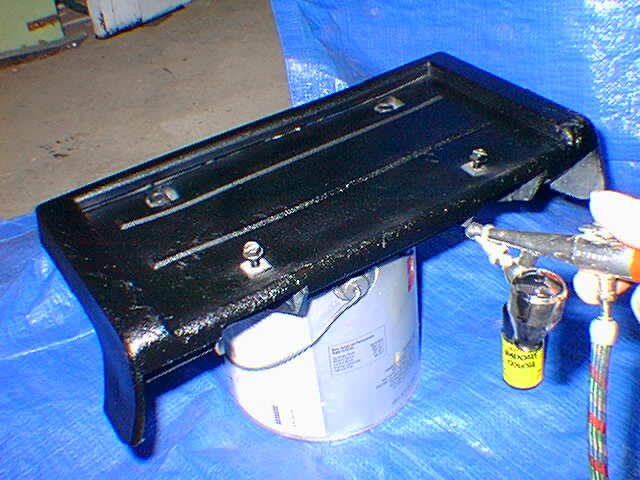
After all the bolts were removed, the bumper slides right off, and weighs only about 25 pounds. I removed all the hardware like to top rubber cap, license plate frame, air dam, and end caps. It is easier to remove this stuff after the bumper is off the truck. I then painted all the hardware black with an air brush, and some touch up paint. The black plastic hardware had gotten greyish looking.
Painting the license plate frame
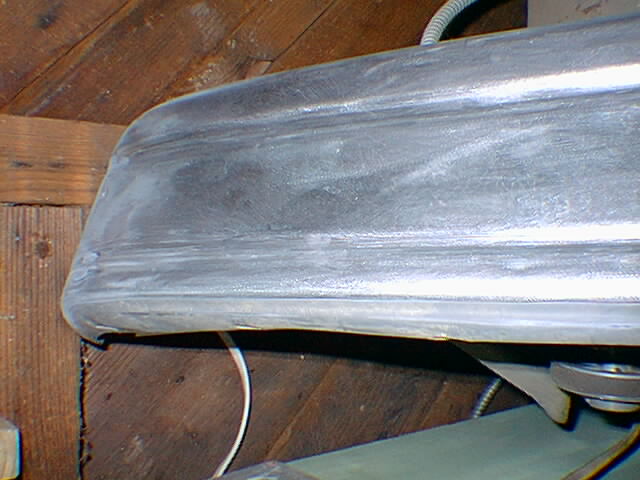
I then went at the poor finish of the bumper with 60 grit sandpaper, and a finishing sander. It was then I noticed all the screwed up repair jobs this thing had been through. I got side-swiped and the body shop re-painted this bumper, what they didn't do was sand it, and re-apply the paint. The bumper had 4 layers of paint on it, and only the first layer was primed! The other thing I noticed is that this was not a OEM GM bumper. You can tell that because they are galvanized. This one was just painted black, primered, then painted
Shiny bare metal after sanding it down
The next step is to apply the primer. I did this with just ordinary auto parts store primer in a spray can. I used up an entire 16oz can of spray paint on the bumper, so I would have a thick enough layer to sand. After the primer was left to cure for a few days, I went back and sanded it lightly with 220 grit sandpaper for a smooth finish.
I had some silver paint that the body shop had given me left over from a previous repair. It was about 2 years old, but was still good. To paint the final coat, I used a Craftsman spray gun connected to my 3.5 HP air compressor. I set the air pressure to 60lbs. The finish that it made was quite nice! The metallic paint came out even and smooth.
I then took a heat gun on low, and heated up the bumper
to cure the paint and harden it up. The next week, I put all the
hardware back on the bumper, and attached it to the van. My neighbor
got some replacment brackets out at Chesterfield Auto parts, a junkyard
that encourages you to go out in the yard and pull your own parts.
The bumper fits back on the van perfect with the new brackets. I
also put the vinyl bra back on the van to keep the fresh paint from getting
scratched up.